How To Use Tent Stakes – Everything You Need To Know

If you are an outdoor person, you know well how exciting and adventurous camping is. Chances are you are a novice camper who needs to know the basic guidelines of how to use tent stakes or tent peg.
Or perhaps, you are a regular camper facing difficulties to stake down your tent in the right way. Well, no matter which situation you are in, we can help you.
In this article, we have put together some handy guidelines you can follow easily to use tent stakes. Let’s get started from the root of the topic.
Read More: How To Set Up A Camping Tent
Why Use Tent Stakes?
You may wonder about the necessity of tent stakes. Honestly, it’s not a must to use tent stakes in most cases. But you should never take the risks of facing a sudden roar of the wind.
As a camper, you must encounter various changes (sudden or not) in the environment. For mild weather, using tent stakes is not certain, you have the option to say adios amigos to stakes.
However, when weighing down your tent is a must-to-do, going for tent stakes is the best option.
So, basically, tent stakes do these for you:
- Holds your tent upright
- Puts your tent under tension and adds space
- Makes the tent wind-resistant
What Type of Tent Stakes Should You Choose?
The material and the shape of tent stakes matter, because using the wrong tent stake is similar to not using stakes at all.
The most common stake materials on the market are four in number, let’s get to know a bit more of them.
- Aluminum: For soft to medium soil, tent stakes made of aluminum will work great. These stakes are lightweight and bend quite easily. Aluminum stakes are inexpensive and common.
- Titanium: The strongest yet lightest option is the tent stakes made of titanium. You can hammer them into the ground without worrying much because they are near unbreakable. So, these stakes are perfect for hard or frozen soil.
- Plastic: Plastic stakes are cheap and big in size. However, they are good for soft soils. They cannot be reshaped or bend like metal stakes.
- Steel: Steel stakes are heavier than other types of stakes. They work like a champ when you deal with frozen or clay soils. Also, they work well in medium or hard soils.
And, the most commonly-used shapes of tent stakes are:
- Round Wire: This is the most common shape of tent stakes. It’s popular for its versatility. Also, the round wire one is the most prone to bend.
- Screw-shaped: If you are going to camp in a sandy area, this type of tent stake should be your choice.
- V-shaped: It’s a great pick for both the soft soil and packed soil. Assume the ‘V’ stands for this stake’s versatility. They come with a large surface area and make your ‘driving the stake in’ job easier because the pressure spreads more evenly.
- Nail-shaped: These stakes are also known as pegs. They tend to come as longer and thicker than other types of stakes. You can take help from a hammer to drive them in, rather than using a mallet. No matter if you are camping on rocky, hard, or frozen ground, they will work their job perfectly. However, it’s not the best option for soft soil or sand.
How to Use Tent Stakes in Soft Ground
In general, these are the steps to use your tent stakes.
Step 1: Clear the Site
The very first thing you should do is, find a high but flat ground to set up your tent. The place should be away from any disturbances like water because it may find a way to your tent. However, things are pretty easy for soft ground. Make sure you clean the rocks or leaves on the ground and find the solid ground.
Step 2: Place the Stakes at The Right Angle
Try to place the stakes at a 45° angle from the corner. It will help you to pull the line so lightly that it allows for maximum room inside. Also, it will keep your tent waterproof when the wind speed raises up.
Step 3: Tie Off the Stakes
Hence, you are going to tie your tent stakes. Attach the guylines to the stakes. To do so, you can use the clove hitch knot method. To make your path smoother, here are the simple steps of clove hitch:
- Wrap the free end of a guyline around the stake.
- Cross over itself and around the stake again.
- Slip the working end under the last wrap.
- Pull tight.
That’s it. You’re done driving your stake into the ground for support.
How to Use Tent Stakes in Hard Ground
If you are about to camp on hard ground, follow these steps below.
Step 1: Check and Clear the Site
The first step should be checking out why the ground is hard. Because this may change how and what to do when you put the stakes in.
Why the ground is hard may have two main reasons- either there are rocks beneath the soil or because of impacted dirt.
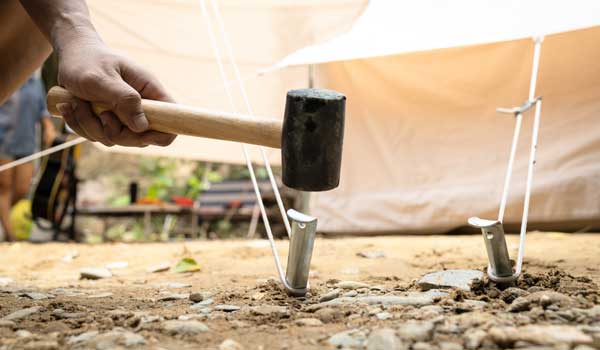
To be certain about which reason actually is here, use a mallet to tap onto the end of the stake. If you listen to a metallic clang, chances are the ground is rocky. Or, you may hear a thudding which means the ground is impacted.
If you’re sure that you are on rocky ground, you may not end up driving the stake by following all the ways. Step 5 is necessary then.
However, if you are dealing with impacted soil, go through the steps below.
Step 2: Pour Some Water and Wait
Mark the spot where you are going to drive the tent stake at first. Then take at least one cup of water and pour it into the site. What the water will do here is, loosens the soil up and makes the soil easier for driving the stake in.
Now, wait for around 3 to 5 minutes and let the water get deep into the ground.
Step 3: Press the Stake In Using a Rock
Grab a wide rock or any hard object that is suitable for the job. Next, put that rock on the top of your stake. Use your hands to press down that rock as hard as you can.
While finding the rock, make sure it’s wide enough. Because a wide surface will evenly spread out the pressure while you press it on the stake.
If things are okay, you’ll see the stake going all the way. Otherwise, you need to move on to step 4.
Step 4: Tap on The Stake When it Gets Stuck
So, you pushed the rock hard on the stake but it got stuck. Now, you have to use the mallet to tap on the rock. Put gentle pressure, no need to hit as hard as you can. If you are sure that it gives way at all, you are done.
In case, you do not feel any give yet, keep pushing on the rock. Maybe getting the stake in all the way feels impossible. In this case, target for a minimum of half of the length of your stake, however, ⅔ will be better.
Step 5: Weigh Down the Stakes Using Other Rocks (Optional)
If you are in bad luck, the soil is so rocky that the stakes aren’t going in all the way, there’s a way. You can add a piece of weight like a rock to your stakes. It will not only keep the stake down but also relieve you from tripping over it continuously.
So, yes, you have put tent stakes into hard ground.
How to Use Tent Stakes in Sand
And, what if you are going to tent in a beach or sandy area? Well, it’s even simpler than other situations, have your eyes on the steps below.
Step 1: Choose the Site
As usual, the first thing you are going to do is to find a perfect spot for setting up your tent. When your camping is on the sand, a few things should be your concern.
First of all, if there is a water source near you, do not get closer. Chances are the water line changes hugely according to the tides, weather patterns, and the wind.
Also, some beaches do not allow for tents. So, watch it first you pick the right spot that is not problematic with local laws and regulations concerning camping on sand.
Camping near trees is a good idea. Trees will provide you shelter from the sun, rain, and windbreak.
Step 2: Set Up the Tent
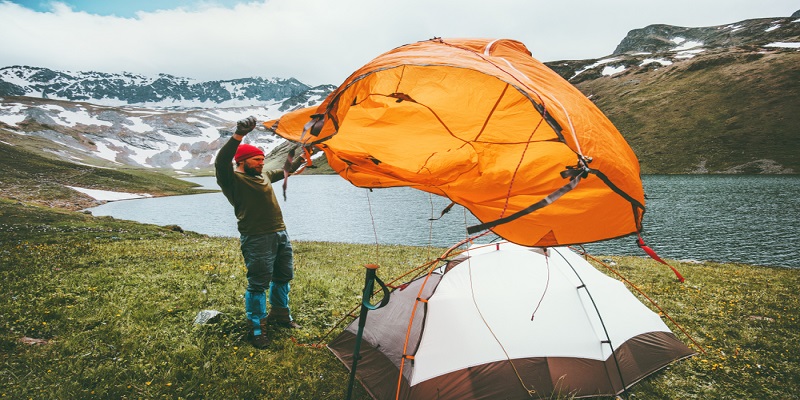
Once you’re stable with the spot, set up your tent now. Follow the directions carefully that come with your specific tent. Generally, you have to spread the material and then insert the tent poles. Once done, you’ll want to tie the poles together as well as reinforce the fabric.
Step 3: Insert the Stakes
When you are done setting your tent up, you will want to secure it. It’s better to start with one corner of the spot and insert the stake into the sand.
If you use a straight stake, use a hammer to push it down. Otherwise, you may only need to put the stake’s sharp end into the sand and then twist it when you press down.
When it is in, use your guy lines or you can tie the tent loop around the stake.
However, make sure your tent takes down firmly into the sand.
Since you are dealing with sand, using a straight stake will be harder. However, a rock will work greatly to hold it down. Then, move one tent stake loop to the other side as well as drive your stake in.
Keep doing so until each of your stakes is in.
Additional Tips
As you know a lot of things to do, there are some things not to do. Here you go with some tips, make sure they are in your mind while using the stakes.
- Make sure you drive the stake all the way into the ground.
- Do not use your foot in order to drive the stake into the ground.
- Make sure you are using the right type of stake for a certain type of soil.
- Keep the hook of your stake facing away from the tent.
- Reinforce the weak stakes with something heavy such as a rock.
- Pull the guy lines tightly so as to make your tent tight enough.
Frequently Asked Questions of How To Use Tent Stakes
Conclusion
Congratulations! Now, you know everything about how to use tent stakes. Since we tried not to skip any necessary points, you may find these guidelines, trips, and tricks helpful.
Be careful from choosing the type of stakes to following the method of using them. As you’ve seen, different grounds need different stakes as well as different ways to use the tent stakes.
However, if you follow our instructions properly, you can do it amazingly!


