How To Clean a Microwave with Vinegar

Clean Microwave
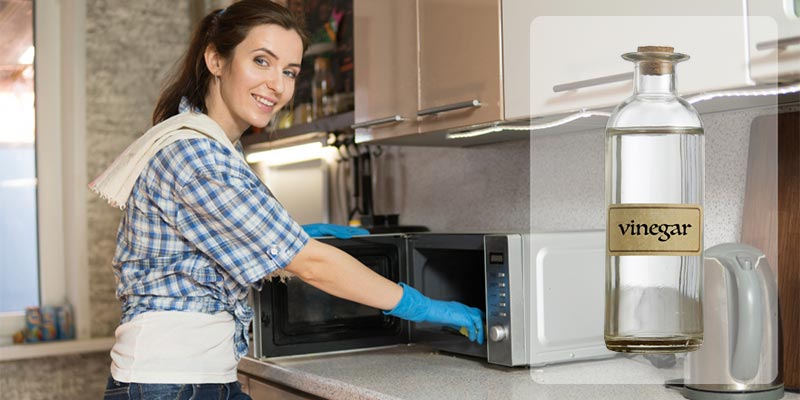
Thanks to the acidity of the vinegar, it’s the main reason why vinegar works amazing when it comes to cleaning kitchen appliances. Looks like you are here to know how to clean a microwave with vinegar, well, then you are in the right place.
In this article, we have come up with the most effective ways to clean your microwave using vinegar. Also, we have laid out some additional information related to the topic that you will find helpful.
And, that was enough prologue. Let’s get to the point now.
Why Choose Vinegar Over Other Cleaning Agents?
Yes, there are a lot of options to clean a microwave. But vinegar comes straight to the mind firstly cause it’s a cheap and easy way to do the job. Acidity is the main reason why vinegar works like a champ in the cleaning world.
Yes, the pH of distilled white vinegar is around 2.4 meaning it’s very acidic and should be diluted using water. The acidity of vinegar removes any kind of dirty messes such as hard water stains, soap scum, or glue residue.
Also, it’s not time-consuming and really easy to use vinegar to clean a microwave. So, busy people like us find it helpful to clean their microwave.
To sum up, you should think about using vinegar over any other cleaning agents because:
- It contains no fumes or harsh chemicals
- It’s inexpensive
- Works great to remove odors
- It’s an amazing sanitizer
- Has no bad effect on the environment
How to Clean a Microwave with Vinegar- 2 Easy Methods
When you use vinegar to clean your microwave, you can choose one of two different methods. Let’s see what’s what and how to make them happen.
Method 1: Using Steam From Vinegar Solution
Here’s everything about method one.
Things That Are Needed
- Warm water
- White vinegar
- A wooden spoon or wooden skewer
- Microwave-safe bowl or glass measuring cup
- Rubbing alcohol (optional)
- Microfiber cloth
Step by Step Process
The steps below will make your path easier.
Step 1: Preparing Things
Consider it 0-step cause here you need to do some preparatory tasks. First of all, take a microwave-safe bowl and pour white vinegar (1 cup) into it. Also, add 1 cup of one water to it. Done?
Now, put that bowl or cup into your microwave. Take a clean, wooden spoon and put it into the liquid. Sounds weird? Well, this step should be taken so that the hot water and vinegar mixture don’t be overheated that may result in an accidental explosion.
Step 2: Set The Microwave
Here, you have to set up the temperature of your microwave. Set it for 5 to 10 minutes though it depends on how powerful a microwave you are using. Well, just turn it on now.
Wait for the suggested duration and then get back here to remove the bowl from your microwave. Make sure you get this job done so carefully to avoid your hands being scorched. It’s better to put an oven mitt on while you handle it.
Step 3: Clean the Inside of Your Microwave
Once you remove the bowl, grab a paper towel or better grab a clean cloth actually. Next, you have to wipe the door of your microwave. Do it gently and make sure you clean the rest of the oven’s inside properly.
What happens here is, the steam from the vinegar and water mix will be loosening up the spills and splatters. It makes your job easier because you don’t need to scrub actually, only wiping the surfaces gently is enough.
Step 4: Clean the Outside
Once you are done cleaning the inside of your microwave, you will want to see the outside sparkling as well. To make it happen, take a microfiber cloth in the first place. Then, pour either a little amount of window cleaner or some rubbing alcohol on the cloth.
Then, wipe the outside of your microwave using that dump fabric as well as polish it. See the sparkling shine now!
Method 2: Vinegar and Baking Soda
If you don’t want to follow the first method we shared, here’s another option for you. Baking soda and vinegar are available ingredients that most people have around them. Cleaning your microwave using these two ingredients is really easy.
You need to take a quart of warm water firstly and add 4 tablespoons of baking soda to it. You should stir and mash with enough force for making sure that the powder dissolves completely.

Now, take a clean cloth or sponge and then dip it into the solution. Then, wipe the cloth over the entire surface inside of your microwave.
The next thing you are going to do, take equal amounts of white vinegar and water and mix them in a microwave-safe bowl. Now, put that bowl in your microwave and set up the oven on high power. Set the duration for 3 minutes. Once the water boils and you see ‘end’ on the display of your microwave, wait for 10 minutes.
Waiting for 10 minutes will let the steam work like a champ. Once the time is over, get back to the microwave and remove the bowl from the inside.
Take a bowl of hot and soapy water. Then, eject the removable components and soak them in hot water.
And, you should keep cleaning the microwave interior with the water and vinegar mixture until you see there is no baking soda residue.
So, these are the ways you can follow to clean the microwave with vinegar. But, what if you want to use any other homemade cleaning agents to clean your microwave instead of using vinegar? Well, there are ways. Let’s see what we are talking about.
What to Do When Vinegar is Not Your Option
Okay, there are numerous options out there if you are not willing to use vinegar for cleaning the microwave. For example…
Steam Cleaning Without Using Vinegar
To follow this method, you will need:
- Lemon juice/lemon essential oil
- Water
- Sponge
- Spray bottle
Step-Step Process
Here you go with the step-by-step process.
Step 1: Preparatory work
Dampen your sponge in the first place. You should make it as saturated as you can. Once done, put that damp sponge into your microwave.
Then, take a spray bottle filled with some ounces of water. After that, add 3 to 5 drops of lemon juice or lemon essential oil to the water.
Step 2: Spray the Inside of The Microwave
When you are done making the solution, spray the inside of the microwave using the mixture. You should spray it carefully the entire microwave, all over, meaning sides, top, and bottom.
Then, you have to set the microwave for 2 minutes as well as turn the oven on.
Step 3: Wipe the Inside
After 2 minutes your microwave will turn off. You have nothing to do for the next few minutes, just leave that sponge inside your microwave, and yes, leave it with closed doors.

Wait for some minutes and let the sponge get cooled enough. Once you find it cool to handle, take the sponge for using it to wipe your microwave’s inside. You will see all the grease and gunk sliding off so fast.
How Can You Get Unpleasant Smells Out of Your Microwave?
Sometimes, you may find a strong and really unpleasant smell coming from your microwave, right? I, myself burn my popcorn sometimes, and ugh, don’t want that smell coming back again!
So, here’s what you should do while facing a situation like the above.
- If there are strong odors (e.g burnt popcorn), you should clean any remaining leftover and apply an absorbing gel there.
- And, in the case of light odors (e.g strong food that has a strong aroma), leave the door open and let the air out in the first place. Or, you can do something else- put a small amount of baking soda in a bowl and place it inside of your microwave, make sure the door is closed.
Any Easy Way to Get Rid of The Stuck-on Food From Your Microwave’s Interior?
Yes, you can easily get rid of stuck-on food from the interior of your microwave, there are a number of effective ways. Using lemon juice will work the best. It’s simple- squeeze a lemon and take its juice in a bowl.
Then, place that bowl into your microwave, set the duration for 5 minutes, and turn the microwave on. After straight 5 minutes, get the bowl back and damp a sponge using that lemon juice. Then, scrub gently with that damp sponge, you can easily remove the stuck-on food residue from your microwave.
How Often to Clean Your Microwave
Cleaning your microwave once a week is enough. Trust me, it’s not hard to do the job if you follow our instructions properly, you will find it easy to clean and maintain your microwave.
Even, you clean the microwave weekly means you are totally safe from completing a huge job later. If your microwave has a really strong odor, you can clean it using lemon slices that work great.
And, do not forget to clean the touchpad and handle of your microwave because these places need to be free from germs and bacteria. In case, there is a combination of a vent hood and a microwave that is mounted over the stove of your kitchen, you should not skip cleaning the vent filter as well.
Additional Tips
When you heat up the vinegar solution or whatever solution you are going to use for cleaning purposes, remember that the liquid will be very hot. Never handle it without wearing an oven mitt or gloves, it’s important to protect your hands.
In case, there is still vinegar leftover in your microwave after cleaning it, you can use it for removing the grease on your kitchen cabinets or your stovetop. Vinegar works great as a degreaser and works best when you use hot vinegar.
Instead of putting the vinegar bottle straight away once you are done cleaning, you should use it for cleaning your bathrooms and kitchens from top to bottom, washing the windows, as well as dusting your furniture.
Also, you can use it to deep clean your carpet, clean your drains, as well as wash your laundry. Trust me, once you find the hidden cleaning power of vinegar, you will want to make the best use of it.
Some people cannot tolerate the natural smell of vinegar, what if you are one of them? Well, in this case, you can make scented vinegar yourself. You can simply add something like rose, lavender, mint, orange peels, rosemary, or whatever scent you like the most to the bowl of vinegar. But do not use any dark-colored herb as it may stain the surface of your microwave.
Frequently Asked Questions
Conclusion
Voila! Now, you know all about how to clean a microwave with vinegar. Not only this, but we have also talked about how you can clean your microwave when vinegar is not your option.
Nothing can beat the effectiveness of regular cleaning your kitchen appliances. If you maintain regularity, you don’t have to deal with a huge cleaning job later. And, tips and tricks that we shared above, will make your job way easier.
Good luck!


